IP Plan Module
To start with the IP Plan, you have to enter your subnets. Press Create Subnet in the Module IP Plan - Subnet.
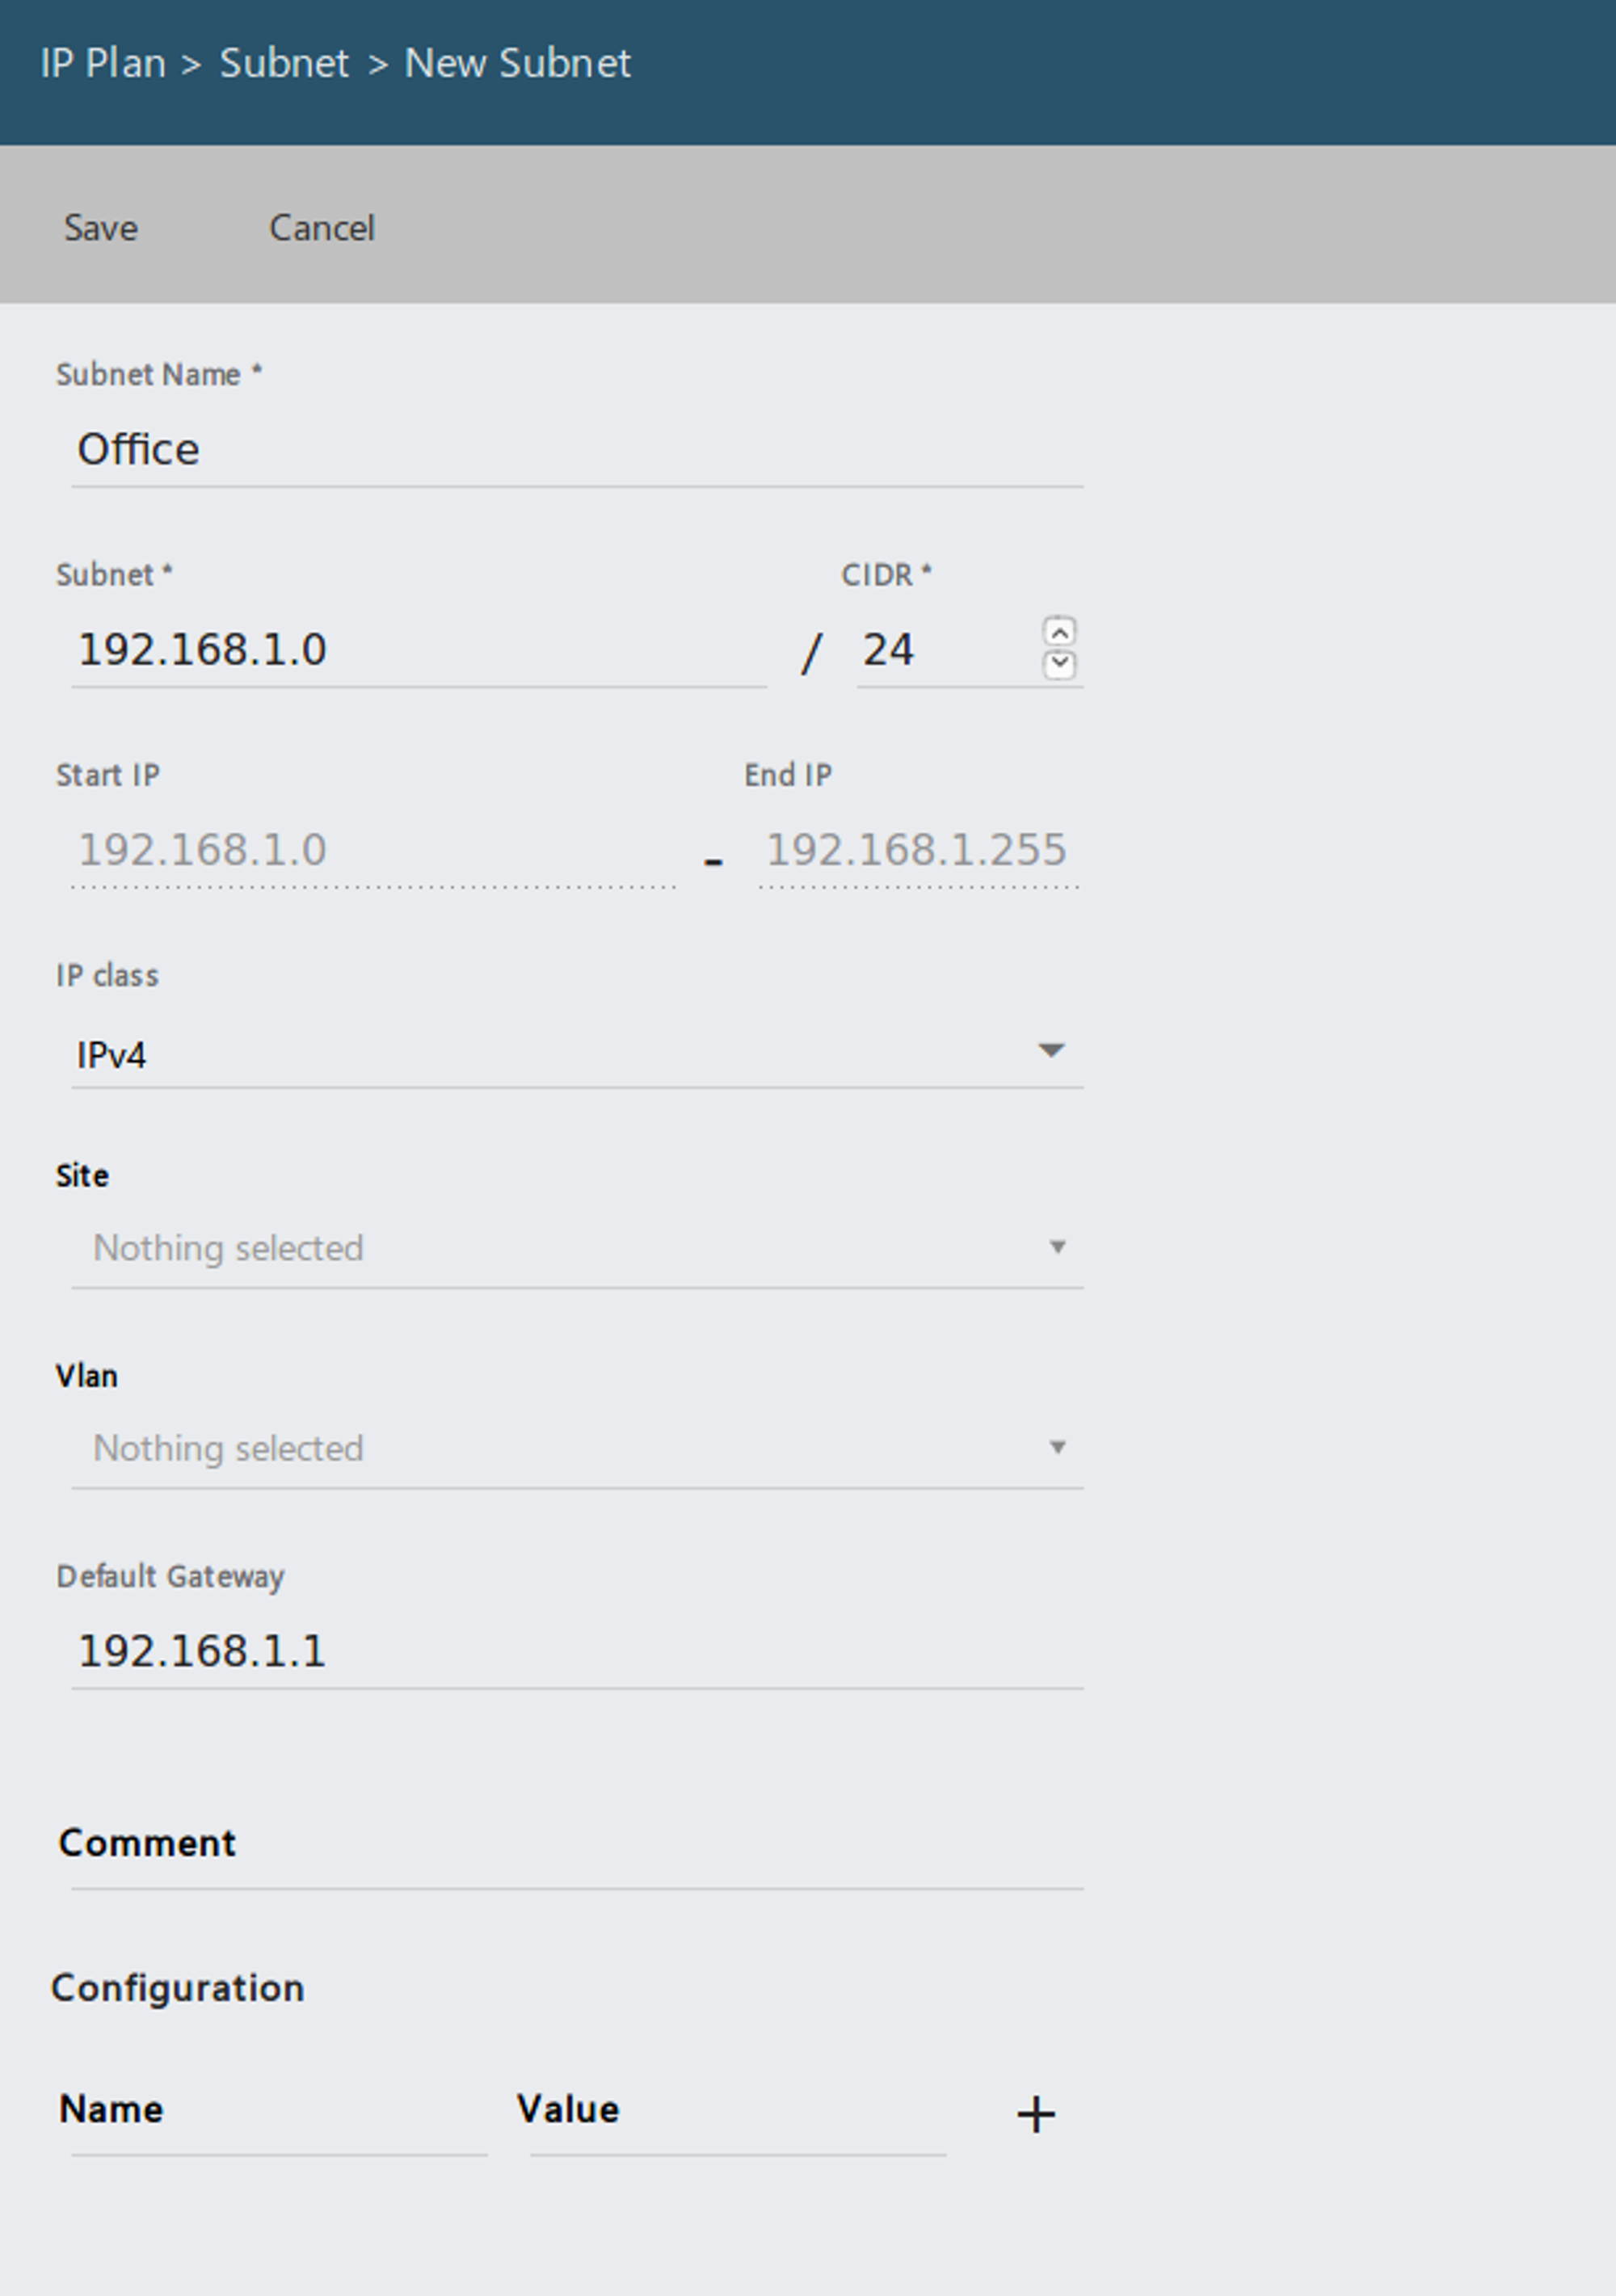
Common Fields:
- Subnet Name: e.g. Office, Home, Server, ...
- Subnet: IPv4 Subnet like 192.168.1.0
- CIDR: How many Bits are your subnet width? e.g. 24 Bits for a 255.255.255.0 Netmask
- Default Gatway: Optional for the Visualization.
After you have entered the Subnet, you will see an overview of used IP addresses in the subnet.
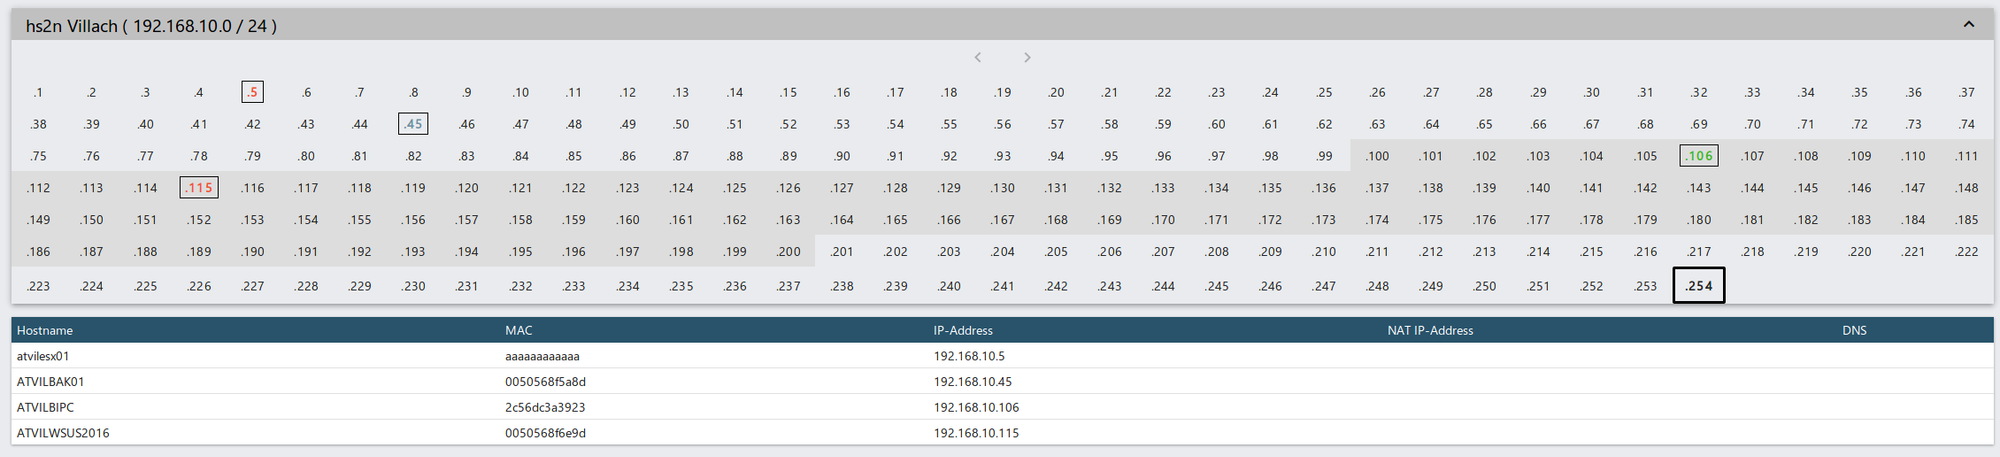
Legend:
- IP in Green: The hardware (IP address) is online
- IP in Blue: The Agent has reported the IP recently
- IP in Gray: The hardware has been created manually. e.g. none Windows Machine
- IP in Red: The hardware has been offline for a while. The hardware probably doesn't exist anymore. So don't trust the IP address since it could be outdated.
- IP in Black: Default Gateway
- Dark gray background: This IP is covered by a DHCP scope
Firewall
Here you can document your Firewall.
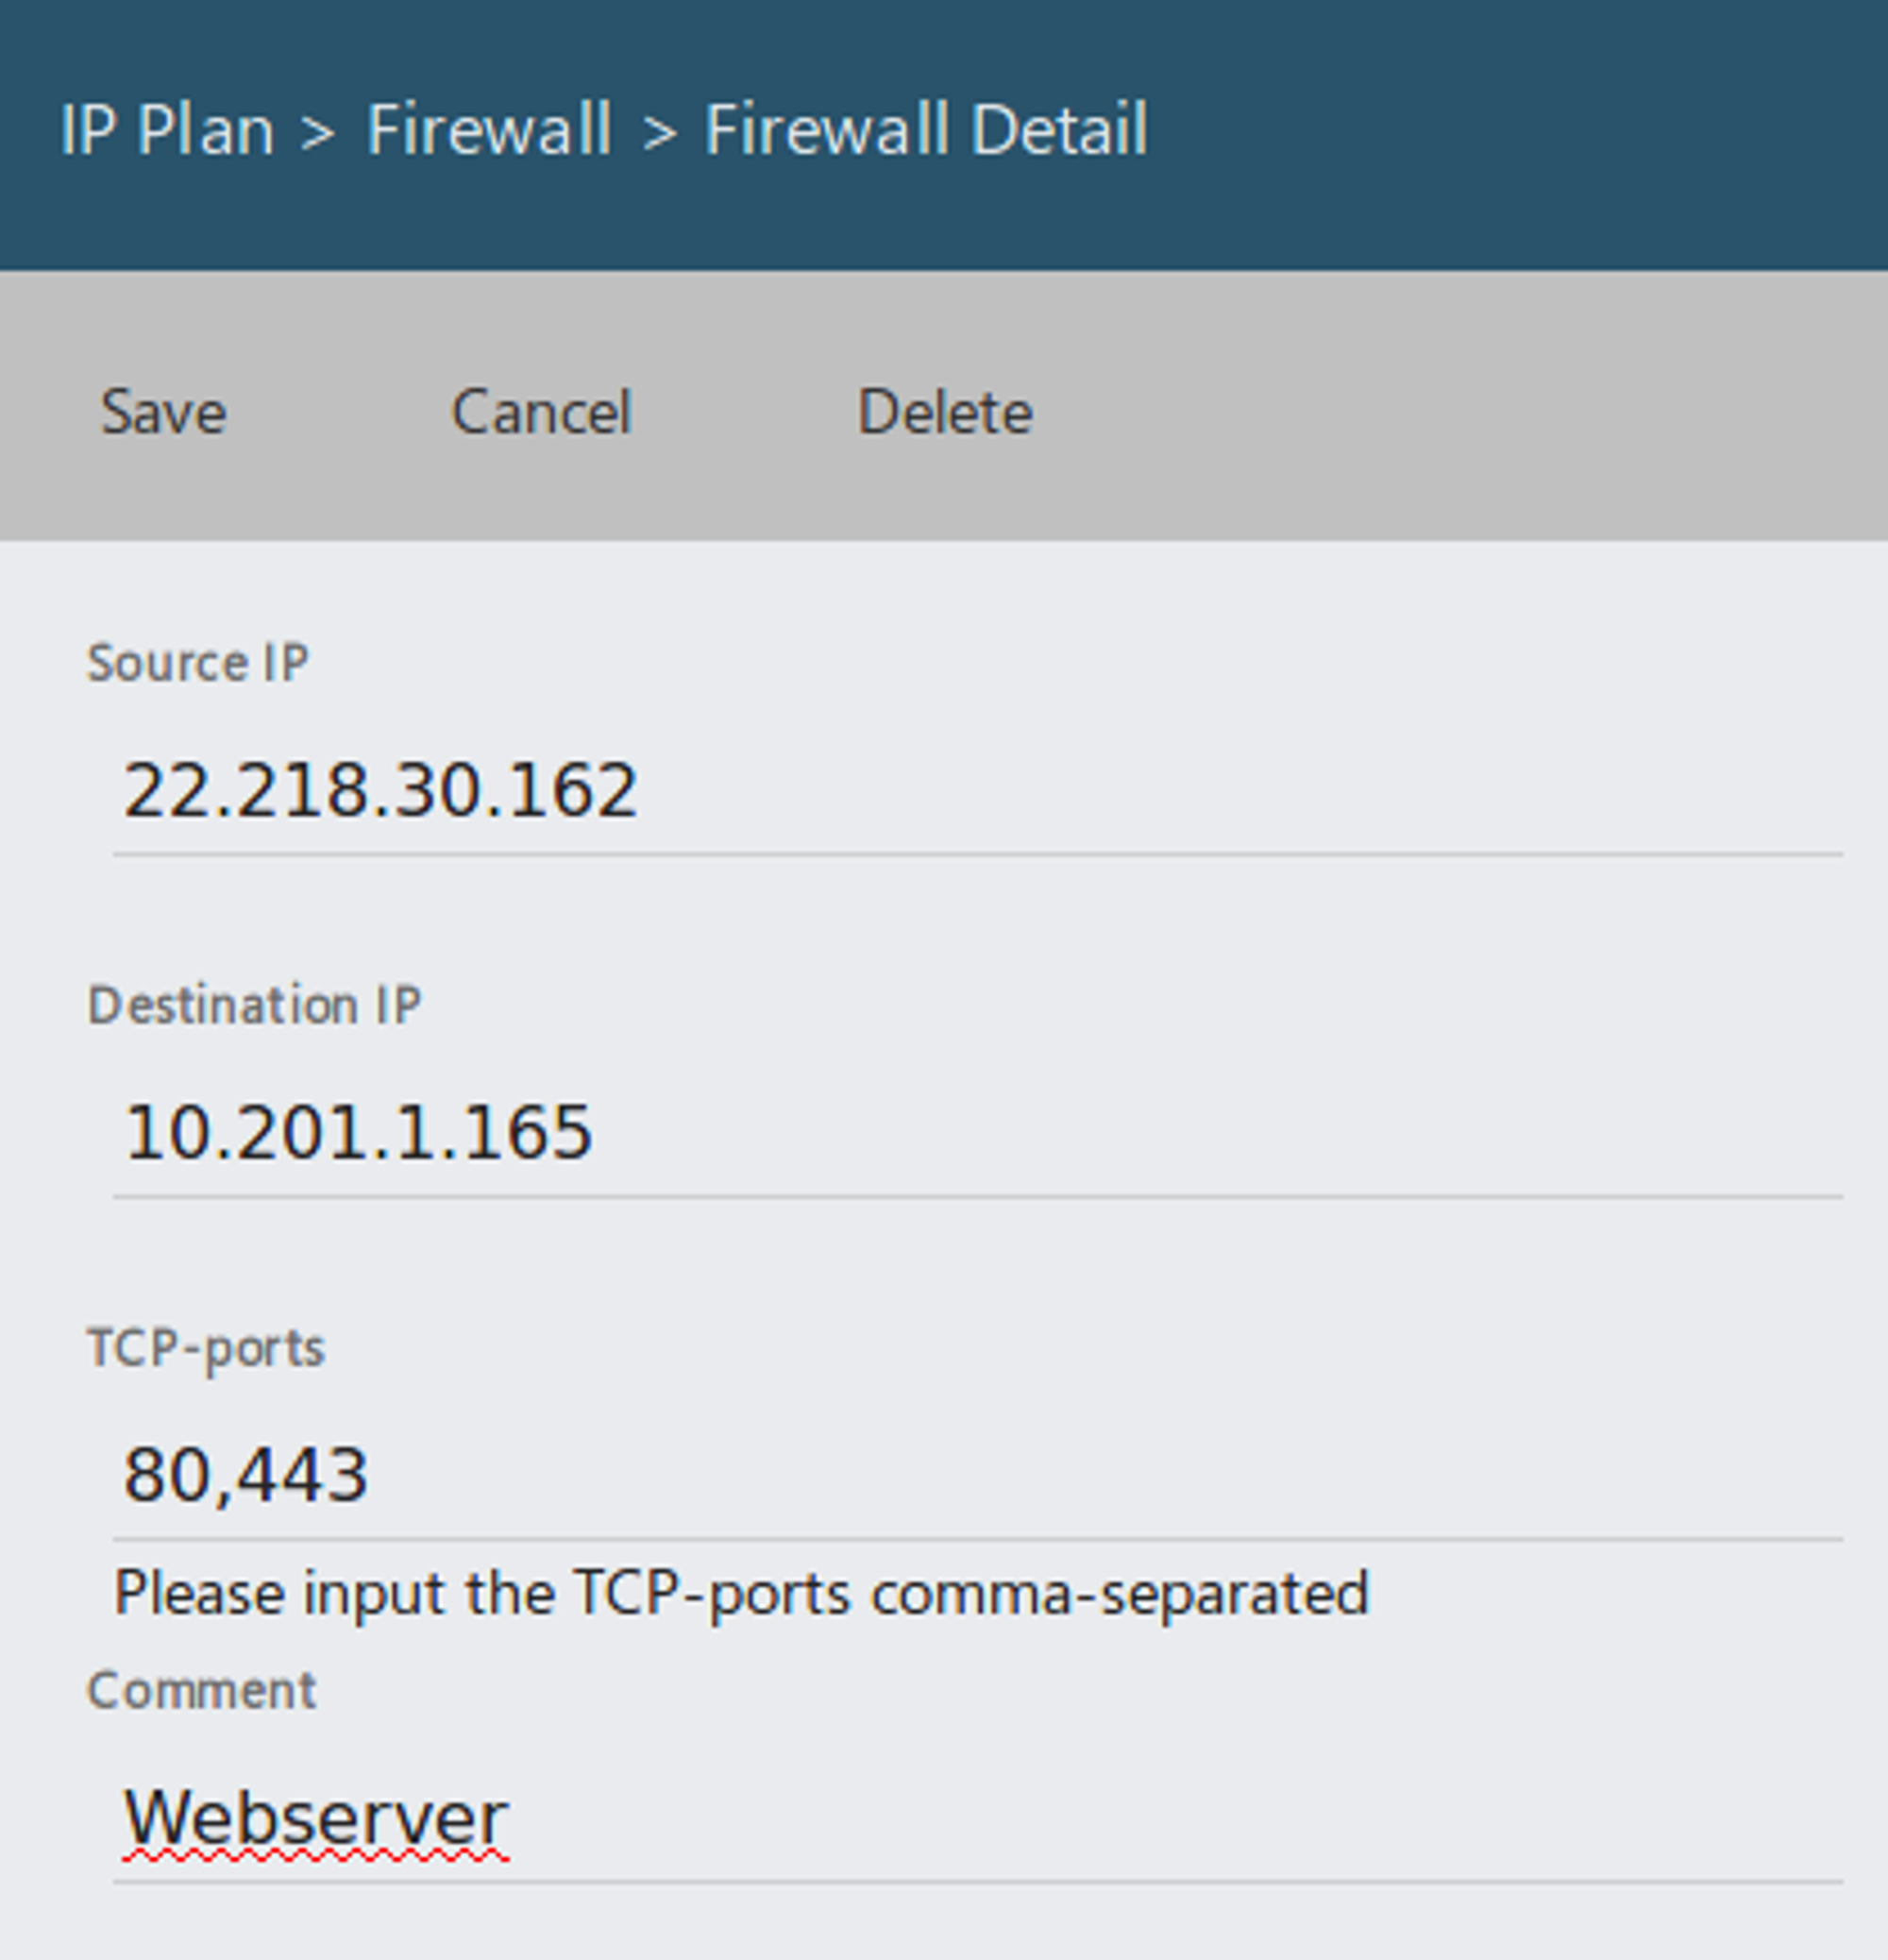
Fields:
- Source IP: external IP
- Destination IP: internal IP
- TCP Ports: Comma separated list of open Ports.
The information from the Firewall will be used in the Module IP Scan and in the IP Plan.
Subnet Values for Software Rollout
When creating subnets you have the possibility to add configuration variables which can be referenced in some Job actions.
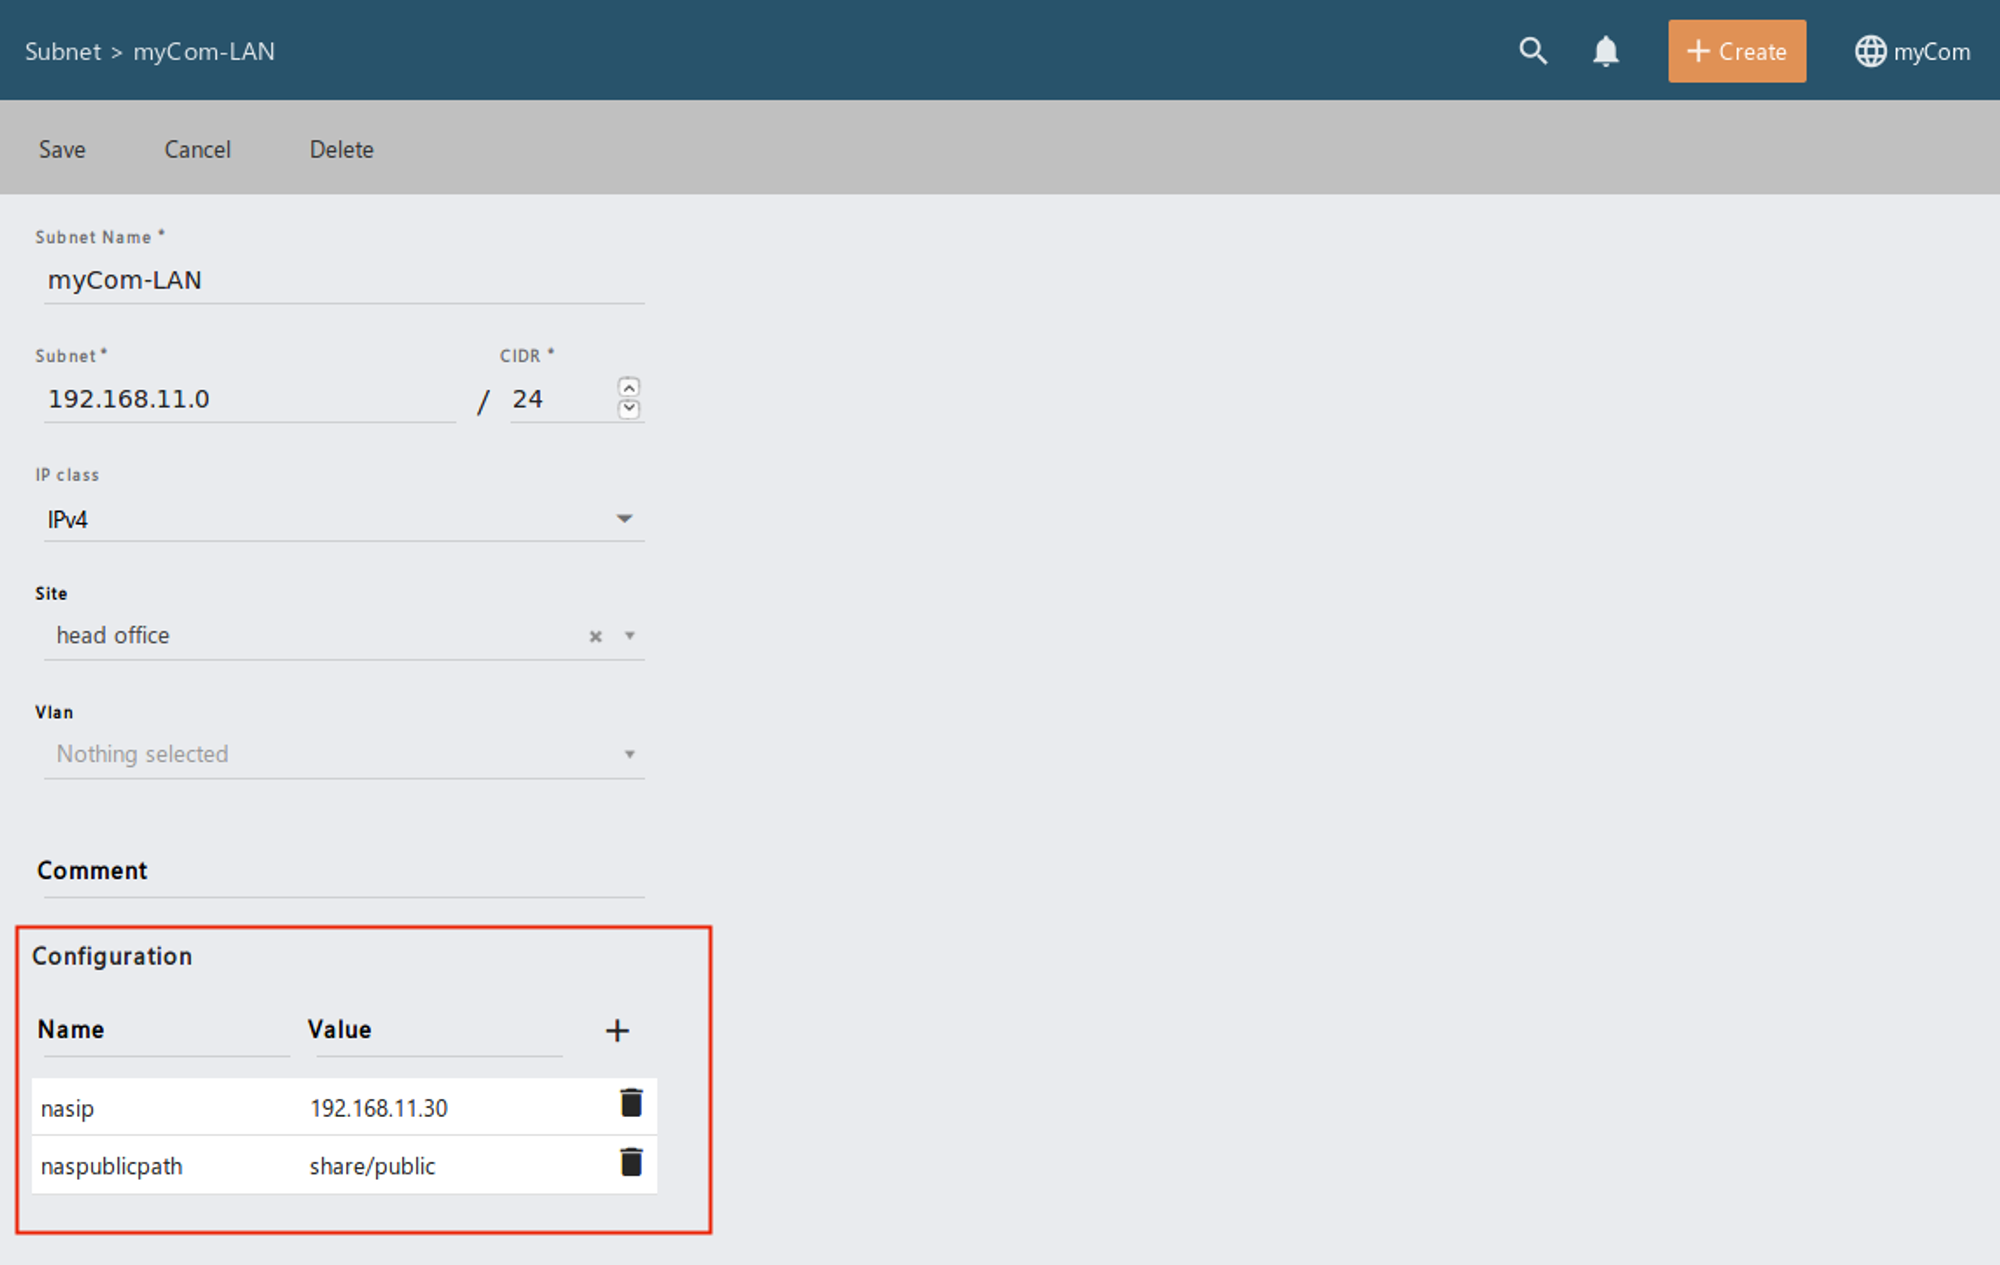
To use the configuration variables, the following syntax must be used: $[Configuration name]
e.g.:
http://$nasip/$naspublicpath/install.exe